
Vector Laboratories is closed for the President’s Day on Monday, February 19th. We will be back in the office on Tuesday, February 20th.
We will respond to emails upon our return. Have a wonderful day.
Menu
Vector Laboratories is closed for the President’s Day on Monday, February 19th. We will be back in the office on Tuesday, February 20th.
We will respond to emails upon our return. Have a wonderful day.
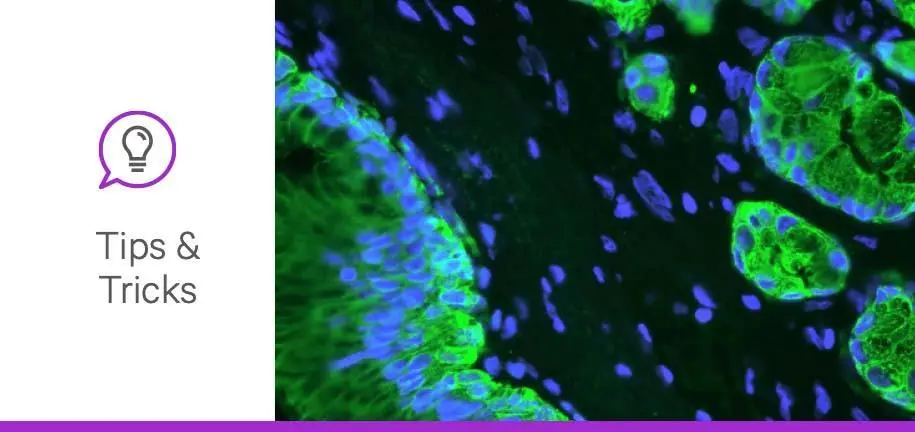
Immunofluorescence (IF) is a powerful but simple method for visualizing protein expression in tissues or cells using fluorophore-conjugated antibodies. Interfering background signal, such as autofluorescence, which is fluorescence inherent or endogenous to tissue, cell, or due to certain fixatives, can hamper your ability to accurately distinguish real target antigen expression. In fact, autofluorescence can come from a combination of detection reactions such as primary and secondary antibodies and the tissue components themselves. According to Dr. Craig Pow, “This background fluorescence affects the signal-to-noise ratio. And what I mean by that is the noise is the background, and the signal is the target signal that you’re trying to report on. What you want in a best-case scenario is no background or no noise and a very high signal to give you an unambiguous view of what you’re trying to look at.”
In a recent webinar, Dr. Craig Pow discussed common causes of target signal interference, controls to help distinguish background noise from true signal, ways to reduce or eliminate autofluorescence, case studies of autofluorescence quenching, and tips to preserve immunofluorescent signal, such as through the use of Vector® TrueVIEW® Autoflurorescence Quenching Kit. You can watch the full on-demand webinar or keep reading for tips and tricks from the Q&A session.
This can be easily done by examining your specimen. Simply cut your tissue on a microtome, mount onto a glass slide, and then visualize that section under a fluorescence microscope. If you have fluorescence from the unstained section, that would be referred to as autofluorescence. Be sure to check if the autofluorescence is ubiquitous and all over the spectrum.
Autofluorescence is generally only discovered once fixation, prep, and cutting the tissue sections has been completed. If you have flexibility in the choice of fixative though, you can reduce the extent of autofluorescence. Consider an ethanol or a non-aldehyde base fixative, such as acetone, which tends to be more of a precipitating fixative than a cross-linking fixative. These might not induce autofluorescence if fixatives are the source of the problem in your sample prep.
For something like lipofuscin however, it’s generally already in the sample before you fix it or cut it, and usually must be addressed after the tissue is already on the slide.
Though we have not done that ourselves in house, looking through the literature we can see investigators have looked at preparations expressing GFP. They detected it with an anti-GFP antibody and then used TrueVIEW afterwards.
In a quick literature search, there did not appear to data of applying TrueVIEW to GFP expressing tissue without using an anti-GFP antibody. However, if TrueVIEW were applied in this manner, we would not expect GFP signal reduction given the action of TrueVIEW on many different fluorophores, and the fact it does not reduce fluorescence of similar tracers.
Concerning mCherry, there are some published references out there that show the combination of retention of mCherry signal and reduction of background with TrueVIEW use.
To retain the reagent around a tissue section, investigators use pen residue from a PAP or an ImmEdge® pen or something related, usually a wax-based material, to keep that reagent in place, reduce the volume required, etc. These pen residues have a certain degree of inherent autofluorescence in them, and they can be present or viewed under the fluorescent microscope at the same wavelength as your given specimen.
It is important to note the viewed image is not over the top of the actual specimen you’re looking at. If you’re looking at it 5x under an objective or 10x, you might see the fluorescence from the barrier. Once you start to focus in with a 40x objective though, none of that external fluorescence is going to interfere when viewing the fluorescence on the specimen.
It can, so that might be something you have to work around on some platforms, such as RNAscope. With certain detection methodologies, TrueVIEW may lower the signal intensity of the specific signal as well as reduce the background fluorescence, so you can modify the dilution of the TrueVIEW. Reducing exposure of the specimen to TrueVIEW by reducing incubation time is also an approach.
When imaging, modifying the exposure time with the camera can be helpful. Instead of a 100 milli sec exposure, you could use a 400 milli sec exposure to bring that signal up without appreciably bringing up that background.
There isn’t a given tissue where TrueVIEW would not be effective unless its autofluorescence is due to lipofuscin. It may just require a little bit of optimization with the incubation time of the TrueVIEW. Most tissues require a 2–5 minute incubation time, but there may be tissue types where a longer incubation time would be beneficial in reducing background from those elements. In one of the case studies presented using RNAscope, diluting TrueVIEW gave an optimal result. If you are struggling with high fluorescence in a given specimen, apply the TrueVIEW initially as per the instructions, and then leave it on longer and see if that helps.
These enzymes are associated with mitochondria and metabolically active tissues. In these instances, autofluorescence tends to express in the blue DAPI spectra of about 450 to 460 nm. With TrueVIEW treatment, in the absence of DAPI, the specimens appears black and there is no residual fluorescence from these elements. Therefore, TrueVIEW appears to be effective against NADH and NADPH.
Watch our on-demand TrueVIEW webinar for more tips to help you distinguish background noise from true signal, explore case studies, and learn how to preserve your immunofluorescent signal. Be sure to check out our IF Resource Guide to help you navigate the workflows and select reagents.
Got more questions? Check out our FAQs or connect with an expert to learn more.




Stay in the Loop. Join Our Online Community
Together we breakthroughTM

©Vector Laboratories, Inc. 2024 All Rights Reserved.